 Skip to content Skip to content
Samsung Odin Flash Tool
Odin is Samsung's official flashing software used to install firmware, recovery, kernel, and other files on Samsung Android devices. Download the latest version below.
Recent uploads

Download Odin3 v3.06
Odin3 v3.06 – Overview Download Odin3 v3.06 it is an incremental but important update released after v3.04, around late 2012 to early 2013. It was designed to work with Samsung…
All Odin Versions
Download Odin3 v3.06
Odin3 v3.06 – Overview Download Odin3 v3.06 it is an incremental but important update released after v3.04, around late 2012 to early 2013. It was designed to work with Samsung…
Download Odin3 v3.04
Odin3 v3.04 – Overview Download Odin3 v3.04 it is a major update in the Odin tool series, marking the transition from the older 1.x interface to the modern 3.x framework.…
Download odin3 v1 86
Odin3 v1.86 – Overview Download odin3 v1 86, it is one of the last versions in the Odin 1.x series, released around 2012, during the era of Android 4.0 (Ice…
Download Odin3 v1.83
Odin3 v1.83 Overview Odin3 v1.83 is a minor update in the Odin 1.x series, released around 2011–2012, targeting Android 2.3 (Gingerbread) and Android 4.0 (Ice Cream Sandwich) devices. It was…
Download odin3 v1 82
Odin3 v1.82 Overview Odin3 v1.82 is a slightly updated version of Odin used mainly during the Android 2.3 (Gingerbread) and early Android 4.0 (Ice Cream Sandwich) era. It followed Odin…
Download odin3 v1 70
Odin3 v1.70 is an older version of Samsung's internal flashing utility, commonly used between 2010 and 2012. It was mainly used with devices running Android 2.3 (Gingerbread) and early Android…
How to Flash Samsung Devices with Odin
Step 1: Requirements
- Samsung USB Drivers installed on your PC
- Original USB cable (recommended)
- Samsung device with at least 50% battery
- Downloaded firmware file for your device
- Samsung Odin Flash Tool
Step 2: Enter Download Mode
Turn off your Samsung device. Then, press and hold the Volume Down, Power, and Home buttons simultaneously (or Volume Down and Bixby on newer devices) until you see the Download Mode screen.
Step 3: Connect Device to PC
Use the original USB cable to connect your device to your PC. Odin should detect your device and display "Added!" in the log section.
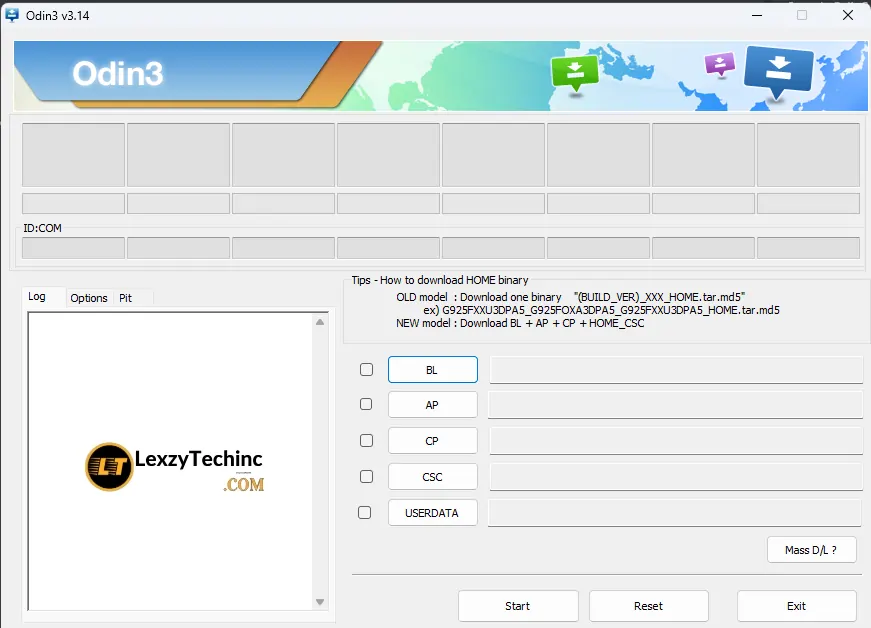
Step 4: Load Firmware Files
In Odin, click the AP button and select the AP file from the firmware package. Repeat this for BL, CP, and CSC files if they are part of the firmware.
Step 5: Start Flashing
Ensure that your device is detected and the firmware files are loaded correctly. Click the Start button in Odin to begin the flashing process.
Step 6: Wait for Completion
Wait for the flashing process to complete. Odin will display "PASS!" in green when the process is successful. Your device will automatically reboot.
Watch the Tutorial Video
Credit: Samsung Flashing Tutorials
Frequently Asked Questions
Yes, Odin is Samsung's official flashing tool used by service centers. As long as you download the correct firmware for your specific device model and follow instructions carefully, the process is safe.
If you flash official Samsung firmware using Odin, it typically won't void your warranty. However, flashing custom ROMs, rooting, or using patched versions of Odin may void your warranty.
If Odin is stuck at "Setup connection," try these solutions:
- Reinstall Samsung USB drivers
- Try a different USB port (preferably USB 2.0)
- Use the original Samsung USB cable
- Restart your PC and try again
- Make sure your device is in Download Mode
To find the correct firmware for your device:
- Check your device model number in Settings > About phone
- Look for firmware specific to your model number and region
- Verify the Android version compatibility
- Download from reputable sources like SamMobile
Troubleshooting
Having issues with Odin? Select the problem you're experiencing:
Odin Stuck at "Setup connection"
This usually indicates a problem with the USB connection or drivers.
- Reinstall the latest Samsung USB drivers
- Try a different USB port (preferably USB 2.0)
- Use the original Samsung USB cable
- Make sure your device is properly in Download Mode
- Try running Odin as Administrator
- Disable antivirus temporarily
Odin Shows "FAIL!" Message
If Odin displays "FAIL!" during flashing, try the following:
- Ensure you're using the correct firmware for your device model.
- Check if the firmware files are corrupted; re-download if necessary.
- Try using a different USB port or cable.
- Make sure your device has sufficient battery.
- Reboot your PC and try again.
Device Won't Boot After Flashing
If your device doesn't boot after flashing, try these steps:
- Enter recovery mode and wipe cache partition.
- Perform a factory reset from recovery mode.
- Re-flash the firmware using Odin.
- Check if the firmware is compatible with your device.
Device Stuck in Boot Loop
If your device is stuck in a boot loop after flashing, try the following:
- Enter recovery mode and wipe cache partition.
- Perform a factory reset from recovery mode.
- Re-flash the stock firmware using Odin.
- Ensure that you didn't flash a custom ROM or kernel that is incompatible.
Visitor's discussions